


A couple weeks ago I gave a talk at Toronto SkillSwap on our process for making and animating the 2.5-D characters in Lovers in a Dangerous Spacetime, and I thought I’d post some of the things I discussed. I’ve always been interested in the mushy space between 2-D and 3-D (when I worked in animation I got to make this secretly-3-D watercolour bank commercial, and had a hand in the early dev of the 2.5-D kids show Justin Time) and for me, finally being able to throw code into the animation mix has been one of the most interesting parts of game dev. (And just a note–“2.5-D” can be used to mean all sorts of things, but here I’m taking it to mean using a 3-D pipeline to create a mainly 2-D game.)
We’re using Unity to build Lovers in a Dangerous Spacetime, so everything is made of polygons–though most objects are just transparent textures mapped onto simple planes that face the camera. There are no lights, we just crank the ambient light all the way up. We’re handling assets in a few different ways, evolving our process as we get more comfortable with the engine.

THE PLAYER CHARACTERS
The main characters are a bit of a time capsule from our early prototype, before we learned animation scripting in Unity. The characters are first animated in 2-D using After Effects, and then the animation frames get rendered to a sprite atlas texture (a big grid of all the animation frames). In Unity, each character is made of a single plane, to which we assign the sprite atlas texture. The plane only displays a zoomed-in piece of the texture though, and we can show different frames of animation by changing which zoomed-in bit of the sprite atlas texture is displayed.

![]()

The one place where the player characters get some scripted animation is with their squash and stretch. By squashing the whole plane a little when a character hits the ground, landing from a jump feels more physical and reactive, and doesn’t interfere with which animation frames are playing–you hit the ground running and squash without breaking stride. Super simple, but it adds a lot to the feel. There are a few other places where we do similar things.
THE “SPUTNIK” ENEMY
This simple bad guy is assembled from planes. This was the second character we built, and all the keyframe animations were made in Unity, with separate animation files for each of the moving parts (NOTE: This was very silly; there’s a reason skeleton armatures exist). One of the tricks I borrowed from Tomb Raider 1’s trees is the criss-crossed planes for the legs–they can rotate around the body in 3-D, while still showing form from any angle. And when we script the playback of the enemy’s animations to react to its movement, even this simple guy starts to feel more lively.
")

THE JELLYBOMBER
With this enemy we built and animated a straight-up skeleton rig in Maya, while still limiting the geometry to front-facing planes. After animating movement cycles for the four cardinal directions, the cycles can be dynamically blended and speed-changed in code to react to the creature’s positional movement. This is the real power of using 3-D rigs for 2-D characters–all the procedural animation control. We also use this to trigger cracks appearing in the glass as he takes damage (the crack planes are otherwise scaled down and hidden behind the body), and we have the jelly’s eyes blink and dynamically track the player’s position.
")

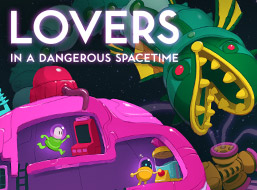
THE GREEN MONSTER
For this mini-boss we utilized Unity’s ability to separate clips into animation layers. The head and the body are part of the same rig, but their animations play back on separate layers. This gives us the ability to blend together the various movement animations according to acceleration and direction, while at the same time the head’s idle, charge and shooting animations are triggered according to the enemy’s logic independent of how it is moving.
")

THE POLISH
Since we’re aiming for a vectory neon look we’re naturally going to be suckers for bloom, and one of the benefits of a fixed 2-D view is that we can just bake glows and bloom right into our textures. Also, because our assets are quite light, we can afford to be be pretty liberal with particle effects. And to help stitch all the elements together, we found that placing a few slowly-shifting large polygons in front of the camera, each with a texture of just some faint blurry colours set to additive blending (“flare”-type) really helps sell a glowy space environment with subtly shifting light.
